
How to flash your chip.
Download the package

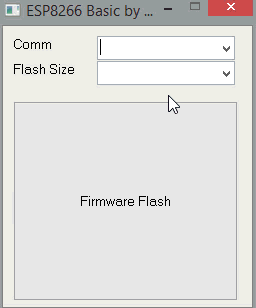
Set up the flasher
|
Select Your com port number and flash memory size for your chip.
|
|
Hook up your ESP in flashing mode. For Node MCU boards just plug in your usb cable.
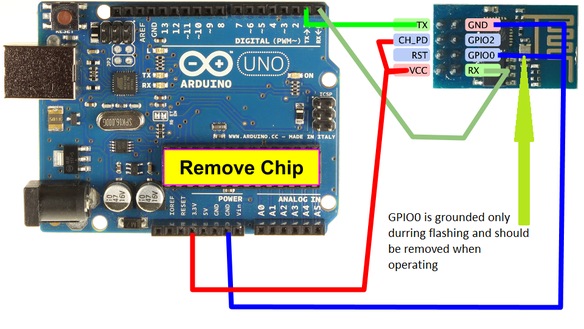
Hook your ESP8266 module up in flashing configuration as shown.
Click the "Firmware Flash" button.
Wait for the flash to finish with out errors. IF there are any errors check your wiring.
Reset the ESP8266 module with out GPIO 0 grounded.
If you have a NodeMCU simply hold down the flash button and pres the reset button one. Then Click "Firmware Flash" in the flasher dialog.
Connect to the ESP network
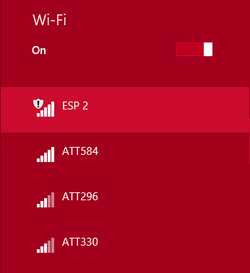
The module will attempt to connect to the last network it was connected to. Because this module has never been connected before it will start its own access point.
Connect to the "ESP" access point
Connect to the "ESP" access point
Access your ESP via the web browser.
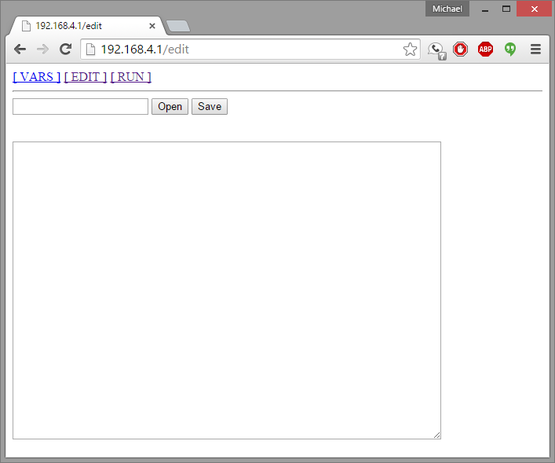
Goto http://192.168.4.1/edit in your browser. You should see a screen that looks like this.
You can now use the edit area to type basic programs for the ESP8266.
Saving the program with no file name will make it the default program that is loaded upon restart of module likewise clicking the open button with out a program name specified will open the default program.
To connect to you you wifi access point see the wifi example.
Head on over hear to learn about the user interface.
