
The User interface
The Edit Page
|
The real magic that makes ESP8266 Basic so amazing is the fact that all programming is done in the web browser.
This is truly a novel feature. No need for a USB to serial converter or wires of any kind. Just open your browser and punch in the IP address of the module and you are off to the races. The web based interface works on smartphones and tablets too making it ideal if you don't want to lug a heavy laptop around with you to program your devices. |
Uploading Code
|
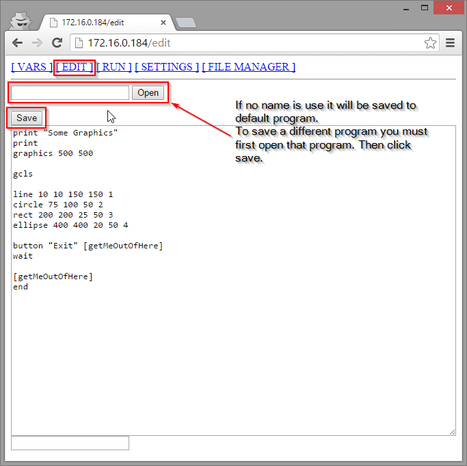
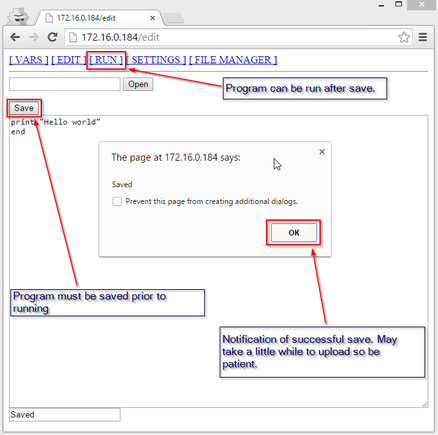
Uploading code could not be easier. Just type or past it into the edit area.
If you want to name your program you must type the name you want in the text box by the open button. Then click open. This will open the program if it exists so you can modify it. If the program does not exist it will save to it upon hitting the save button. |
|
Settings Page
|
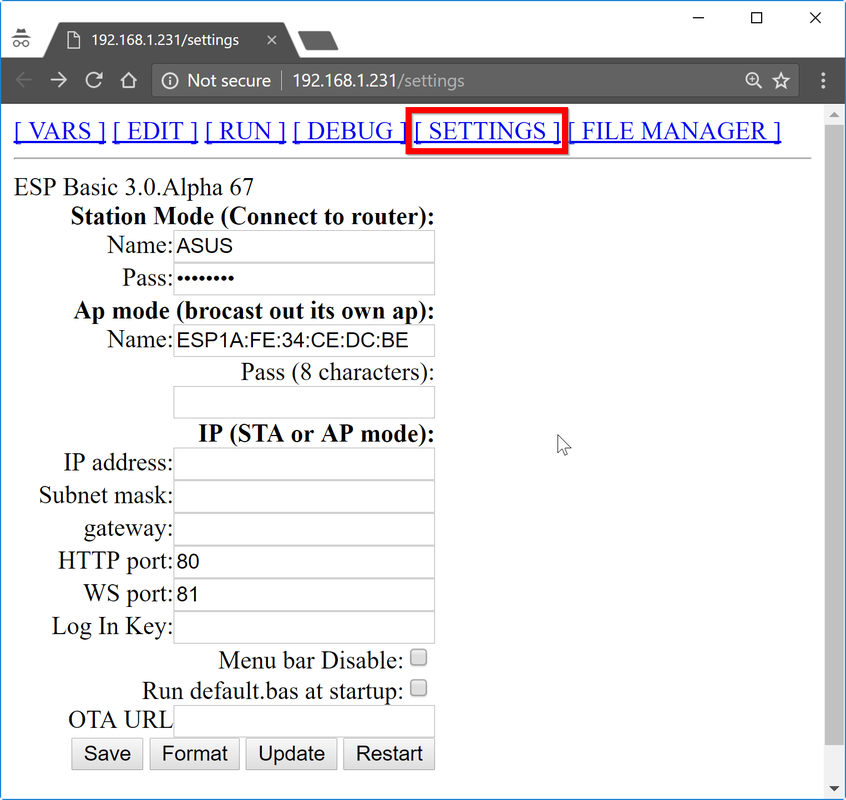
On the settings page you can specify the network it should connect to on boot time (Station Mode).
You can also configure the device to start up in AP mode and set a network name and password for this. If desired a static ip address can be used. This will set the static ip for both ap and station mode. The port numbers for the web server and web sockets can be changed. Make sure that if you are port forwarding outside of you local fire wall you same port numbers on the router and on the esp. Both must be port forwared. The log in key allows you to secure the devices editor, settings and file manager functions.If set the device will prompt for a log in key before allowing any one to get to these pages. You may disable the menue bar with the "menu bar disable" checkbox. If you check this option you must manually goto the edit, run, vars, debug, settings pages. You may optionally set the device to run the default.bas file on start up. There are also buttons to save the settings, format the file system and restart the device. |
Debugging with vars Page
|
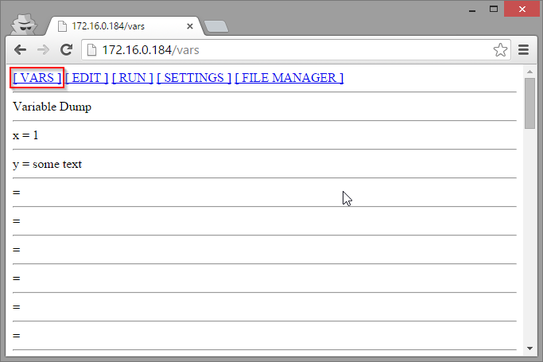
Being able to tell whats going on is important while programming.
The vars page lets you take a peek under the hood and see what all of your variables are set to. If you have a log in key set it will prompt you for that key before allowing you to view this page. |
|
Hardcore Debugging with the debugger
|
|
If you are ready for a real time browser based debugger you can use the built in browser based debugger.
Watch the video to the left to see how to make use of the debugger. |
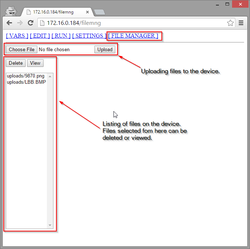
File Manager Page
|
Files and images can be uploaded to the device using the file manager page.
You my also delete and view files by selecting them from the file list. Files uploaded to the device can be accessed by using a url like the example below. HTTP://192.168.4.1/file?file=FileName.png Simply change the ip address and file name for your particular set up. |
|
